
In earlier posts I looked at what a Docker image looks like
and a dig into how it looks at runtime. In this
entry I’m going to look at ways of running containers beyond a simple
docker run command.
docker-compose
This is an additional program to be installed, but it’s very common in use. Basically, it takes a YAML configuration file. This can describe networks, dependencies, scaling factors, volumes etc etc. Pretty much anything that can be done via the CLI can be described with the compose YAML file. The reason why it is used is that it makes it very easy to describe a reasonably complex run-time and have it all started with a single command.
Building an app and a MySQL database
A typical use case for docker-compose could be to have an application
in one container and a database in another. The application could talk
to the database and can be scaled independently of the database.
In this example, we’ll just build a generic centos container, rather
than an app; this will let us explore stuff.
% cat docker-compose.yaml
version: '2'
services:
  os:
    image: centos
    entrypoint: /bin/sh
    stdin_open: true
    tty: true

  db:
    image: mysql:5.5
    environment:
    - MYSQL_ROOT_PASSWORD=foobar
    - MYSQL_DATABASE=mydb1
    volumes:
    - /tmp/mysqldata:/var/lib/mysql
It’s that simple. As with normal Docker, if the mysql image isn’t present
then the daemon will download it automatically.
This is bad practice, hard coding usernames and passwords into files, so don’t do this in real life :-)
What’s useful about this is that the containers are started on a private network so the database can’t be reached from the outside world; only the “app” can see the database.
Let’s start it up! I want two copies of the OS, and one database:
% docker-compose up --scale os=2
Creating network "compose_default" with the default driver
Creating compose_db_1 ...
Creating compose_db_1 ... done
Creating compose_os_1 ...
Creating compose_os_2 ...
Creating compose_os_1 ... done
Creating compose_os_2 ... done
Attaching to compose_db_1, compose_os_2, compose_os_1
db_1  | Initializing database
db_1  | 170602 16:56:52 [Note] Ignoring --secure-file-priv value as server is running with --bootstrap.
db_1  | 170602 16:56:52 [Note] /usr/local/mysql/bin/mysqld (mysqld 5.5.56) starting as process 64 ...
db_1  | 170602 16:56:52 [Note] Ignoring --secure-file-priv value as server is running with --bootstrap.
db_1  | 170602 16:56:52 [Note] /usr/local/mysql/bin/mysqld (mysqld 5.5.56) starting as process 70 ...
[ ... More MySQL startup messages ... ]
db_1  | 170602 16:56:58 [Note] mysqld: ready for connections.
db_1  | Version: '5.5.56'  socket: '/tmp/mysql.sock'  port: 3306  MySQL Community Server (GPL)
How does this look? What did docker-compose do?
docker-compose created a new bridge (separate from docker0),
and connected the three containers to it. Notice that the name of the
containers match the entries from the YAML file, with a count. There’s
a prefix of “compose”, which is the name of the current directory.
% docker-compose ps
    Name                 Command             State    Ports
-------------------------------------------------------------
compose_db_1   docker-entrypoint.sh mysqld   Up      3306/tcp
compose_os_1   /bin/sh                       Up
compose_os_2   /bin/sh                       Up

% brctl show
bridge name      bridge id               STP enabled     interfaces
br-3f3e56827113  8000.024265371f31       no              veth0e1b53a
                                                         veth55868a8
                                                         vethe42d74c

% docker network ls
NETWORK ID          NAME                DRIVER              SCOPE
3f3e56827113        compose_default     bridge              local
( I edited the output a little, for readability; removed unnecessary data!)
Docker creates resolvable hostnames (internal DNS server) so that each container can reach the other on known names:
% docker exec -it compose_os_1  /bin/sh
sh-4.2# getent hosts os
172.18.0.4      os
172.18.0.3      os

sh-4.2# getent hosts db
172.18.0.2      db

sh-4.2# getent hosts compose_os_2
172.18.0.3      compose_os_2

sh-4.2# ping db
PING db (172.18.0.2) 56(84) bytes of data.
64 bytes from compose_db_1.compose_default (172.18.0.2): icmp_seq=1 ttl=64 time=0.035 ms
64 bytes from compose_db_1.compose_default (172.18.0.2): icmp_seq=2 ttl=64 time=0.047 ms
Since we have two “OS” containers, both of these can be resolved by
the “os” hostname (as shown by the getent output). We can also see that
each container can be directly named and that there’s an FQDN hiding
behind the scenes based on the prefix and the network bridge.
This makes it easy to connect to the database:
With the mysql client inside the OS we can then connect to the database:
sh-4.2# mysql -h db -u root --password=foobar mydb1
Welcome to the MariaDB monitor.  Commands end with ; or \g.
Your MySQL connection id is 4
Server version: 5.5.56 MySQL Community Server (GPL)

Copyright (c) 2000, 2016, Oracle, MariaDB Corporation Ab and others.

Type 'help;' or '\h' for help. Type '\c' to clear the current input statement.

MySQL [mydb1]>
A three tier architecture
We can take this model a step further and create a web/app/db type
of solution, purely out of docker-compose:
version: '2'
networks:
  webapp:
    driver: bridge
  appdb:
    driver: bridge

services:
  web:
    image: web-server
    networks:
      - webapp
    volumes:
    - /home/sweh/Docker-Tests/Web-Server/web_base:/var/www/html
    - /home/sweh/Docker-Tests/Web-Server/log:/var/log/httpd
    ports:
    - "80:80"

  app:
    image: centos
    networks:
      - webapp
      - appdb
    entrypoint: /bin/sh
    stdin_open: true
    tty: true

  db:
    image: mysql:5.5
    networks:
      - appdb
    environment:
    - MYSQL_ROOT_PASSWORD=foobar
    - MYSQL_DATABASE=mydb1
    volumes:
    - /tmp/mysqldata:/var/lib/mysql
This defines two bridges (“webapp” is for communication between the web layer and the app layer; “appdb” is between the app and db), and then places each container on the relevant bridges. We only expose port 80 to the main network, which means that only the web service can be accessed from the outside.
We can see the structures this builds (I ran it from a directory called
Compose_3_Tier and so the prefix is compose3tier). Firstly
the networks. By default they’re a /16 and assigned IP ranges automatically,
but this can be overridden in the YAML file.
% docker network ls
NETWORK ID          NAME                  DRIVER              SCOPE
ad325365d45d        compose3tier_appdb    bridge              local
4d3f4c902ff2        compose3tier_webapp   bridge              local

% docker network inspect --format='{{ .IPAM.Config }}' compose3tier_webapp
[{172.18.0.0/16  172.18.0.1 map[]}]

% docker network inspect --format='{{ .IPAM.Config }}' compose3tier_appdb
[{172.19.0.0/16  172.19.0.1 map[]}]
We can see that each container has been given IP addresses on the relevant networks; the “app” container has two addresses, one for each network:
% docker inspect compose3tier_web_1 | grep IPAdd.*172
                    "IPAddress": "172.18.0.3",
% docker inspect compose3tier_app_1 | grep IPAdd.*172
                    "IPAddress": "172.19.0.2",
                    "IPAddress": "172.18.0.2",
% docker inspect compose3tier_db_1 | grep IPAdd.*172
                    "IPAddress": "172.19.0.3",
And we can see that the web layer can see the app layer, but can not see the DB. It can’t even resolve the db hostname!
% docker exec -it compose3tier_web_1 /bin/sh
sh-4.2# ping app
64 bytes from compose3tier_app_1.compose3tier_webapp (172.18.0.2): icmp_seq=1 ttl=64 time=0.069 ms

sh-4.2# ping db
ping: db: Name or service not known
sh-4.2# ping 172.19.0.3
PING 172.19.0.3 (172.19.0.3) 56(84) bytes of data.
^C
--- 172.19.0.3 ping statistics ---
6 packets transmitted, 0 received, 100% packet loss, time 4999ms
Of course this isn’t a true 3-tier network; the DB layer is still NATted to the main network and so can reach the outside world. We’d need to be a little more complicated with out set up. And, of course, it doesn’t have enterprise features (eg packet capture or flow logs between tiers). But it shows us how a single host can use Docker to create a more secure architecture than traditionally done.
Briefly - docker swarm
This was originally an optional extra but (since Docker v1.12) it’s now built in. The idea, here, is to extend the ‘single host’ model of Docker and make it into a cluster. You can add multiple hosts to the “swarm” and Docker will build VXLAN overlay networks between them, much in a similar way that the single host model builds bridges. Containers will be assigned addresses from the overlay network, which means that containers in the same service can talk to each other, even if they’re running on different machines.
Swarm mode can also replace a lot of the functionality of docker-compose,
although there are some complications due to the distributed nature of
the environment (in the earlier example I used local filesystems as volume
mounts… that won’t necessarily work across 10 machines without NFS or
a different volume solution!)
Naturally it handles scaling and instance recovery.
Between managers (you can have multiple of them, as well) Docker uses the Raft protocol for consensus.
A feature (since v1.13) is present to handle secrets (e.g. passwords,
SSL certs). This data is stored encrypted in the managers. When a
container starts up that has been granted access to the secret then the
information can be read from /run inside the container (an in-memory
filesystem). This is the only place where the secret is unencrypted.
Unfortunately these secrets are static in nature; if you change them in
the swarm configuration (a complicated process) then the container needs
to restart to pick up the changes. This can be done in a rolling nature
so it’s not quite as bad as it seems.
I think a good use case for this may be to present an initial credential to allow the container to login to a vault such as HashiCorp vault where the real credential can be stored and managed.
I’m likely to take a deeper look at swarm mode in a later blog entry because it is built into the product and forms the foundation for Docker Enterprise Edition.
Briefly - kubernetes
Kubernetes started as a Google project, based on their internal container scheduler (“borg”). The original name was “Project Seven” (a Star Trek Voyager joke on Seven of Nine; the logo has seven spikes as a nod to this. It need not be limited to just Docker; other runtimes are available. Docker is a very common scenario, though.
Kubernetes takes a different approach to container application management. Here we bundle a group of containers into a pod. This pod is the basic unit of control in Kubernetes, and all the containers inside a pod are co-located on a single host. For resiliency and scalability you deploy more pods across the cluster.
Inside a pod all the containers share a single IP address (unique across the cluster), just listening on different ports. Additional resources (e.g. disk volumes) can also be associated with the pods. As with Docker swarm, these resources need to be available across the cluster.
Multi-tier applications can be defined as a service, which consists of a collection of pods. Kubernetes provides discovery tools via DNS, and can load balance across pods as necessary.
Secrets management is basic, but has gained better access controls in v1.7
Briefly - Mesos
Originally from UCB, this is now an Apache sponsored project. It takes the approach of a “datacenter operating system” (DCOS). Take the concepts of a normal server (management of processes, memory, disk etc etc), and now treat them as a single distributed entity across your datacenter. Of course locality is important for performance, but this can parallel cache coherency on a single machine. You don’t normally care about what CPU your program runs on; should you care what machine it runs on? Let the DCOS handle the hard bits :-)
To this end it provides a number of services, such as “Chronos”; a cron like program to schedule programs across the datacenter.
Originally Mesos used its own container format, but since v0.20 it can now be used to run Docker containers as well.
A large component of Mesos is “Marathon”; this allows Mesos to be used much like a PaaS (Platform as a Service).
I haven’t really spent any real time looking into Mesos; I really only mention it because large companies (Twitter, AirBnB, eBay… even the CIA) use it and it comes up in conversation. I’m not sure I’d want to use this as a general purpose scheduler, but if you have hyper-scale requirements (thousands of servers) then it’s worth taking a look it.
Argl, too many options!
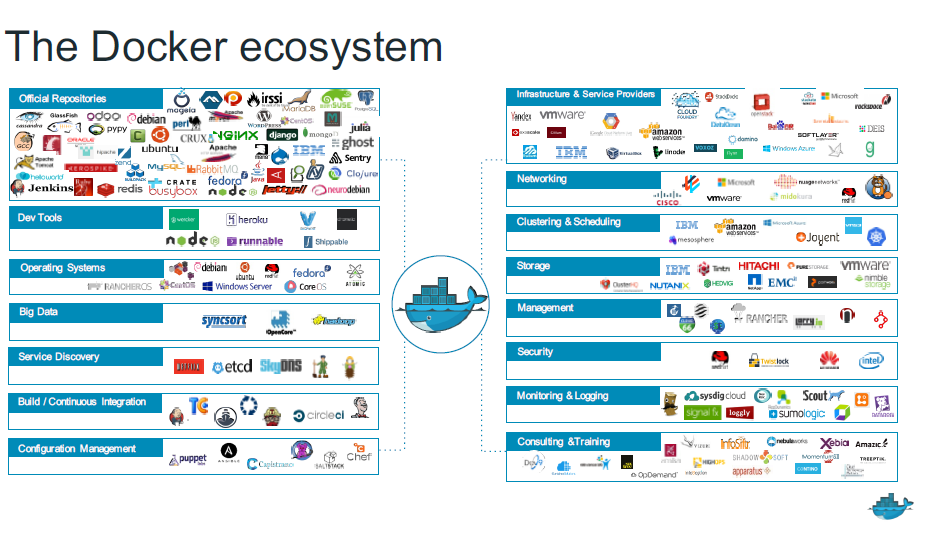 (Source: Docker)
It’s a full time job just keeping up with this! Which is why I’ve only
briefly covered some of the solutions, and may have missed something
really important and clever (or made mistakes). I focused on docker-compose
because it’s simple and powerful, and I’m going to write some more on
Swarm mode… but I just don’t have time to run down every alley.
Summary
Docker has grown from a simple container execution engine into a complete ecosystem of products and partner solutions; every day something new comes along. Even the existing stuff changes (eg the new Kubernetes secrets management stuff had changed since I first drafted this out a few weeks back).
Docker also has a lot more complicated functions (security based around SELinux, seccomp) and the ability to have containers share address spaces (for example, you could add a log management container alongside another one, to forward the logs into Splunk).
From an infrastructure perspective it helps to understand how Docker works (which was the driver for this series of blog posts), so that you can understand the consequences of using Docker. I’m a fan of “knowledge in depth” :-)
But, of course, infrastructure has no use if it’s not to run applications. Docker can be used to create more secure solutions (multi-tier in a single host)… but only if we manage it properly. If developers are allowed to put anything they like inside a container then we can end up in a Wild West scenario and expose vulnerable code to external attackers.